Showing posts with label DIY. Show all posts

Tuesday, August 27, 2013

Bow Holder

Little girl has lots of bows.  I had started them off in a box, but had to dump out the box each time I was getting her ready.  I had seen a lot of these bow holders on pinterest, so decide to make my own.  This was a cheap project!

You'll need:
*a Frame
*ribbon
*paint
*hot glue
*cup hooks

 I bought an unfinished frame from Hobby Lobby and painted it the same grey that 3 of her walls are.  If you have a frame already, you would save on a bulk of the cost.
Then I cut the ribbon to fit the opening of the frame and used a dot of hot glue at the top and bottom to pull the ribbon tight and glue it down.

 I had a letter "S" in my craft drawer, so I added it to the bow holder.  Then I screwed in the cup hooks on the bottom (some went in really easily and some were tough..this step tried my patience).  The good news is that once the cup hooks were in, I was finished.  I just added a picture hanger on the back, added the bows and hung it up.
 The bow holder is a perfect decoration for her closet and makes accessorizing so much easier!

Wednesday, August 7, 2013

DIY Nursing Cover

Sometimes you have to nurse in "public."  Maybe not public, public, but not in your house and for those situations you need a nursing cover.  I have two different kinds.  I have the one from Udder Covers that looks like this and which you can obtain for free with the code PJbaby (you only pay shipping).  I used this one in the hospital, but am apparently not coordinated enough for the loop that adjusts it in the back. I still have it and hope to give it another try soon.

And then there's this kind from Covered Goods that we got when it came up on Groopdealz. 


It is currently my favorite, because it is basically a shirt without arms, much easier to figure out : ) I decided that it would be nice to have more than one, but didn't want to spend the $30 that it costs regular price, so I figured out how to make them.  It is so easy!

You will need
*1 yd of jersey knit (I like the way that it turned out with the heavier jersey knit)
*thread
*a sewing machine if you do not have fear of the bobbin and want to finish it in like 15 minutes (obviously I have bobbin issues..)

Fold your yard of jersey knit in half and then pin along the bottom, the open side and the slants that go up towards the neck (I got to cheat b/c I could use my own as a pattern).
 Cut off excess material (but do not cut the fold, that's like a freebie side).  Then sew the slanted sides up to the neck and the open side.  I did not hem the neck or the bottom of the cover (don't tell my mom, she would be appalled). 
Turn it inside out and you are finished! Easy, right? The first one took me about 3 hours, but that does account for feeding Sadie, play time, diaper changes and bouncing to sleep...so it should take you about 25 minutes on the first one, more like 10-15 if you use a sewing machine. 

Wednesday, July 31, 2013

DIYM Hat

DIY is a relative term, especially when the project you choose requires embroidery and your mom is the one with the machine and the ability to sew.   So DIY is now DIYM...Do it yourself mom. : )  The DIY project I picked, I actually had to have help on : )
After seeing hats like this on groopdealz and pinterest, I decided that I wanted one too.  Using pink chevron fabric left over from Sadie's nursery and a $2 hat from walmart, I made the hat.


 I cut out two circles that were the same size and I...err mom, sewed them together to make a thicker piece of material before adding my monogram.  I then hand stitched the patch onto the hat.  Easy, at least my part was.  : )

My DIY ideas also led us to make these tshirts when I was in Longview for 2 weeks.  We picked up shirts for the girls in the family and Alex (because he is still little).  We then went through the fabric that my mom has and picked out some to match each shirt (the little girls' pockets match and the big girls' pockets match).  Mom eyeballed a pattern for the pockets and did the same thing as for the patch on my hat (double up the fabric, turn it inside out and sew together before flipping back right side out).  She then used her machine to add the monogram to each pocket before sewing them onto the shirts (little dress in Sadie's case).  I LOVE the way they turned out!

*Remember that the blog will be going private August 1st, just to protect the privacy of little missy.  If you have already told me to add you to the list, you are.  If you have not yet done so and wish to continue following, please either leave a comment or email me : )

Monday, April 22, 2013

DIY Ottoman

So you may remember when I showed pictures of Sadie's room, I mentioned an ottoman that we had made.
It all started with this white storage cube.  As we were cleaning out the closet I came across it and didn't really have a purpose for it, but didn't want to trash it. 
You may also remember this headboard.  I made it to fit our queen size bed.  Well once we replaced our queen size with a king, the headboard was no longer functioning.  I took it apart and use the muslin material and foam padding.  I attached the foam to the sides of the cube using hot glue.  I also had Cody cut a square out of the wood from the headboard and attached foam to it as well.
Once the foam had been glued down, I used the muslin material to the outside of the foam to smooth it out and used a staple gun to attach it.  I did the same to the square of wood (that would become the top).


I used the white and grey zig zag from Carousel designs to cover the muslin material (with the cube open side down).  Attaching the fabric was a two person job..one person hold and fold, the other person staples).  Don't let the fabric go too far in..leave some of the wood showing.  We attached the top to the cube using liquid nails. 

Monday, March 11, 2013

Dresser Update

Our parents have been beyond generous as we have prepared for Miss Sadie's arrival.  Cody's parents gave us the dresser that had been in his bedroom growing up to use for her room.  It was a perfect dresser for a boys room.
I decided to make a few changes to it so that it would be ready for a little girl.  I used a few different blogs/pins to figure out exactly how to do this.
1. I wore a mask, so no worries

 2. With gloves on my hands (there are crazy skin warnings on this stuff), I used a degreaser (from Lowe's) to clean the dresser well, removed the drawers from the chest and handles from the drawers.

  
3. Using Zinsser cover stain primer that we found at Lowe's and a cabinet brush, I covered the entire thing.  It took me three coats, but saved me the labor and clean up of sanding. 
 
4. The dresser needed to dry before I could paint it, so I went shopping for a few hours : )
5. I wanted the dresser to be glossy and had read that latex enamel was the best for furniture, so we went with Valspar gloss white latex enamel.  I used another cabinet roller to apply this and it took just two layers. 
 6.  I also primed and painted two of these wooden decorative pieces from Hobby Lobby (that we attached with Liquid Nails) as well as the 4 feet (from Home Depot..you need to buy the metal plates that attach to the furniture which are right by the feet in the store) as I went along. 
  
7.  I picked up some new cabinet pulls when I was at Home Depot also to give it another little face lift. 
 8.  The final product.  I was so pleased with the way it turned out!  It will be Sadie's dresser and changing table.
Before
After

Saturday, December 22, 2012

Christmas Pillow

My Mimi was my dad's mom.  She was married to my Grandpa.  They lived in Marlin when we were little bitty, but moved 30 minutes away from us to Tyler, so we got to see them a lot.  She was a very gentle and patient woman.  She always did needlepoint.  
 
To this day when you go to my parent's house at Christmas, you will see the stockings that she made for my parents, brother and I.  (Side note: We always tease my brother because all of our stockings say our names big.  His says "Merry Christmas" big and his name much smaller).  Mimi had done a needlepoint picture that also said Merry Christmas.  My mother gave this to us last year, but I had no real place to put it.  I decided instead to back it with some trusty burlap (of course) and turn it into a pillow, so now we have a piece of my Mimi's handiwork decorating our couch at Christmastime.
 
Do you have any "heirloom" pieces in your house?  They are just so much more special than the store bought ones!

Thursday, December 20, 2012

Glass Etching

I decided to try my hand at glass etching after seeing it all of Pinterest. 
At Michael's, I located a Martha Stewart glass etching cream (that came with a brush) and the corresponding stencils.  The warnings on the back of the jar make the process seem like it will eat away at your skin (which it well may), so as I didn't have plastic gloves, I used plastic bags to protect my hands (and plastic under the whole set up too in order to protect my counters).  I simply cleaned the glass, adhered the stencil, then generously applied the etching cream.  I let the cream sit for 15 minutes, then washed it off and my letters stayed.
The project originated as jars for some Christmas gifts (for some reason the etching is almost impossible to see in these pictures...).  These are hot chocolate jars (hot chocolate, marshmallows and crushed peppermints)

And the etching eventually turned to three of my pyrex dishes
For these, I thoroughly cleaned the pyrex dishes and flipped them upside down.  I put the stencils on the pan backwards (which was an experience as they are sticky only for the correct way for the letter to face) and then followed the same steps from above.  
It was really an easy way to personalize!

Sunday, August 19, 2012

Bedroom mirror update

So we have this mirror on the wall in our bedroom. Its the kind of mirror that you would expect to find inside the door of a closet (framless, plain).  Well those who previously owned our house decided to put it on the wall.
 
Now don't get me wrong, I love having a long mirror to do a quick outfit check in the morning, but it needed some love.
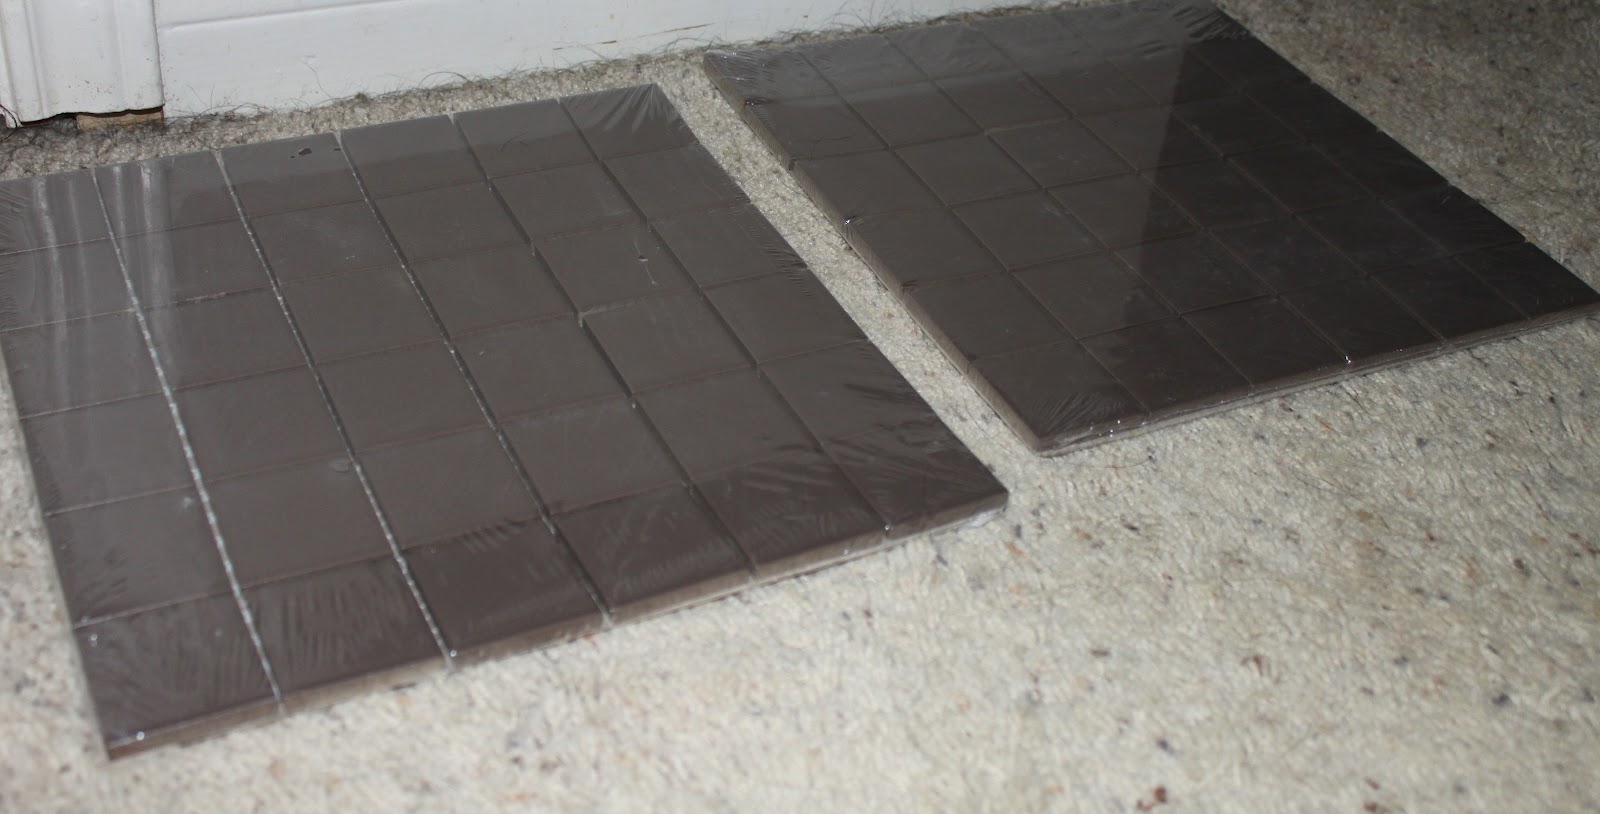
I found these tiles at Lowe's for cheap.. I'm talking like under $3 per sheet (I originally bought two, but ended up needing 3..so it will still an update that cost less than $10).
All that I did was pull of each tile, attach a little hot glue to the back and then place it on the mirror.  I had to put it over some clips as they would not have been thick enough to fit between.  I also had a problem at the bottom of the mirror.  I had a space that was less than an inch left on both corners and ended up having to go up to Home Depot and beg for them to cut my tiles.  Nice guys! : ) But on that note I would recommend measuring before you start gluing.
Here is the finished product, a quick and easy update!

Wednesday, August 15, 2012

Play time

My sweet little niece had her tonsils and adenoids out last week.  Since her little body is healing, she wasn't able to go to school for a week which allowed some of the family members to visit her and play! I got to stay with her Monday and Tuesday.   I planned out quite a few activities (with Pinterest as my guide). 
The first thing we tried was a twist on a pin that I had seen on Pinterest.  Using a canvas, we wrote out her name in duct tape.  She then painted the canvas with pink and purple paint, sprinkling it with glitter when we had finished with the paint. 
 
Once the canvas dried, we pulled off the duct tape to show her name in white.
We made a little jewelry
We also did an experiment that I had seen on Pinterest.  We poured a box of baking soda in a aluminum pan.  In four separate bowls, I poured in vinegar and food coloring.  
 
She put drops of the vinegar in the baking soda and watched the reaction.  This kept us busy for a really long time. : )
I had also found some playdough mats on Pinterest.   I like them because they give specific things for the kids to do.  If I was still in kinder, I would have also made a set for my class.  She liked most of them 
 
but her favorite was the little girl.  We not only added face, but arms, fingers, etc.  We worked on this for a while. 
 
We also found a little time to visit the Baylor bears.  Joy was fast asleep in her shaded room.  Lady on the other hand was out for us to see.  
She even swam which was so exciting for EG to see.
We played frisbee for a while on campus too. 
 I always forget how beautiful Baylor's campus is.  We were there just in time as move in and welcome week started today so we avoided the mass of people.
I absolutely love any time that I get to spend with Erin and Alex and am thankful when opportunities arise!  Happy Wednesday y'all!