Tuesday, August 21, 2012

Just call me McDonalds

Those of you who know me, know that I am not typically a person who gets places early : )  Now I have the best intentions, but I might get distracted, try to fit in too many things or I may just not get up early enough.  This "running late" tends to translate into weekdays too.  I would love to get up each morning and make breakfast for us to enjoy, but its just not going to happen.   So, I found some freeze ahead breakfasts and have about 48 breakfasts ready for Cody and I to eat.
The first is the Vegan Oat bars from this post.

The next thing I made was these Sausage Egg Casserole Muffins.
 
Sausage Egg Casserole Muffins
from Spark Recipes
Ingredients
1 pound Breakfast Sausage
2 cups shredded cheddar cheese
12 large eggs
1/2 t salt
1/4 t pepper
*I added onions and jalapenos diced

Directions
1.  With a little Evoo, cook half of the onion and the jalapeno.
2. Add in sausage and brown.
3.  Mix all of the ingredients together and then pour into a greased 12-spot muffin pan.
4. Cook in a preheated oven (375) for 30 minutes.

To package these once they cooled, I wrapped them in waxed paper or deli sheets and then in a gallon size ziploc before placing them in the freezer.
*Total carbohydrates 0g.


I also made these Breakfast Sandwiches


Breakfast Sandwiches
from The Yummy Life
Ingredients
  • 100% whole wheat English muffins
  •  whole eggs
  • sliced cheese (I used slices of sharp cheddar until I ran out and then switched to Mozarella)
  • Canadian bacon slices or Turkey bacon
Directions
1. Spray 12 ramekins or jumbo muffin tins with cooking spray and add one egg to each (use a fork to slightly break apart the yolk).  If using ramekins, place on a baking sheet.  Put the eggs in a preheated oven (350) for 25-30 minutes.
2. While the eggs are baking, toast the english muffins and then layer the cheese (fold in the pointed corners) and meat.
3.  Once the eggs have cooked, use a spatula/knife to gently lift them out and place them on top of the meat and then place the top of the muffin back on.
4. Wrap each sandwich in wax paper or deli sheets and then in a ziploc and place in the freezer.
*In order to reheat, place the sandwich in the microwave at medium power for 3 minutes.

*Total Carbohydrates 30g.

The last breakfast that I made was Oatmeal packets.  They were so much cheaper to make and easy too.
 
Instant Oatmeal Packs
by A Season for All Things
Ingredients:
1/3 cup quick oats
1 tsp milk powder
pinch of salt
2 tsp light brown sugar
1/4 tsp cinnamon


*Combine all ingredients in a snack size bag.
*To make for breakfast, add the packet to 2/3 cup boiling water.  Let sit for one minute and enjoy. 

I love having a freezer full of food! : )


*Total carbohydrates 20-22g.

Monday, August 20, 2012

End of Summer

So its that time again.  Summer is officially over and that's okay.  I am beyond thankful for the time that I have off each year.  With that being said, I did squeeze every last second out of summer with:
a pool day
dinner with some of our favorite friends to celebrate Mary's birthday
 
sleeping in, being lazy, enjoying a good run,
some deep cleaning of the kitchen (necessary maybe not fun, but glad its done),
and celebrating a friend's engagement.
2012-2013 school year, here we come!

Sunday, August 19, 2012

Bedroom mirror update

So we have this mirror on the wall in our bedroom. Its the kind of mirror that you would expect to find inside the door of a closet (framless, plain).  Well those who previously owned our house decided to put it on the wall.
 
Now don't get me wrong, I love having a long mirror to do a quick outfit check in the morning, but it needed some love.
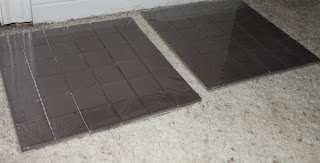
I found these tiles at Lowe's for cheap.. I'm talking like under $3 per sheet (I originally bought two, but ended up needing 3..so it will still an update that cost less than $10).
All that I did was pull of each tile, attach a little hot glue to the back and then place it on the mirror.  I had to put it over some clips as they would not have been thick enough to fit between.  I also had a problem at the bottom of the mirror.  I had a space that was less than an inch left on both corners and ended up having to go up to Home Depot and beg for them to cut my tiles.  Nice guys! : ) But on that note I would recommend measuring before you start gluing.
Here is the finished product, a quick and easy update!

Saturday, August 18, 2012

Insulin Pump

When I had just turned 18, my doctors, parents and I decided that an insulin pump would be the best way to manage my diabetes.  The insulin pump allows me to give myself insulin without having to give shots.  I change the site every 3-4ish days and tell the pump how much insulin to give according to my blood sugars and the amount of food I have eaten.  After receiving the pump in the mail however, I freaked out about it (I mean really who wants to be connected to something all the time) and asked my parents to send it back.  After talking through it a bit more, we decided that I should at least be trained on it before making that decision. 
Well 9+ years later, I am still LOVING my Medtronic Insulin Pump. On my last pump upgrade, I got a blood sugar meter that "talks" to my pump so that once the blood sugar appeared, I could put in the food I was eating and it would suggest an amount of insulin for me to give. 
I just got a new one that has even more features and although I am sure most of you will not care, I am excited, so I'm sharing.
The best feature of my new pump is that I now have a CGMS: Continuous Glucose Monitoring System (aka tests my blood sugar all the time).  
My pump is on my left side (you can see the cord coming from it) and my CGMS is on my right side.  Both "sites" are changed out weekly or a few times a week by me. 
My CGMS checks my blood sugar in increments throughout the day and wirelessly tells my pump.  My pump sets off alarms if my blood sugar is too high or too low and then keeps a graph of the day so that I can see my blood sugar patterns. (This is my pump)

It also came with a USB that connects to their website.  It will wirelessly upload the information from my pump (blood sugars, insulin given and food eaten) and I can share this information with my doctor.  It is amazing!

Friday, August 17, 2012

Back to School

I am back to school on Monday and my kiddos come back on the 27th!  I love my classroom this year and thought I would share it with you! : )
Let me preface by saying that 1. our school is open concept, so think no walls and 2. I took the pics with my iphone quickly so they may not be the best quality:
Welcome to 2nd grade! I will be teaching Reading and Social Studies to 3 classes, so you may see a lot of green, blue and pink and this is because I am color coding my classes.
My front wall which is kind of hard to see from this picture says "The more that you read, the more things that you know.  The more that you know, the more places you go." Thank you Dr. Seuss! I also have the yellow brick road of retelling on the right side (it worked so well with my summer camp classes that I used velcro to place it on the wall for easy use with my class).  Thank you pinterest!
 I have always had trouble getting my anchor charts up right away and my friend, Carolina, had a great idea this year to put up clothes pins to hold those anchor charts, so I copied her.  I placed them far enough apart to accommodate a sheet of chart paper and can fit up 12 at a time.
 Next to my anchor chart wall is my desk
 I am in general an organized person, but when I get stressed or a lot is going on, my desk takes the brunt of it in the form of papers everywhere and sticky notes too.  Pinterest gave me two ideas 1- placing a piece of notebook scrapbook paper in a frame with "to do" at the top to replace sticky notes and 2- labeling my drawers "to grade, to copy, to file" to avoid piles of papers without a home. 
 My classroom library
 Another Pinterest Copy: a jar with highlighters next to the turn in tray that says "WAIT! Did you remember to write your name?"
 Last year, we had a lot of broken books, so I made a broke book tub.  I also have little containers to match their class color for the book shopping cards.
 I was able to hang my word wall (which is kind of far away in this picture) and it kind of gives me a wall.  There is velcro under each letter to attach high frequency words.  On this side I also have my "You have an amazing brain sign," a blank spot for our classroom expectations (I always make them with the students), a cabinet that has yet to be dedicated, an I Spy cabinet for words they find that fit their Words Their Way word lists for the week, a place for the skill of the week, a Reminder about RAH (Responsibility, Attitude and Honor).
 My "Parking lot" (each class has their own..no pink posterboard though, so theirs is white).  I will give the students a task some days in Reading Workshop and have them search in their books, write their response and place it on their name in the parking lot during independent reading.  It will give me the opportunity to do a quick check to see who understood the concept.
 Baskets under the table that are color coded for their class to hold their Reading workshop book bags and Reader's response journals. 
 Happy School year!!


Wednesday, August 15, 2012

Play time

My sweet little niece had her tonsils and adenoids out last week.  Since her little body is healing, she wasn't able to go to school for a week which allowed some of the family members to visit her and play! I got to stay with her Monday and Tuesday.   I planned out quite a few activities (with Pinterest as my guide). 
The first thing we tried was a twist on a pin that I had seen on Pinterest.  Using a canvas, we wrote out her name in duct tape.  She then painted the canvas with pink and purple paint, sprinkling it with glitter when we had finished with the paint. 
 
Once the canvas dried, we pulled off the duct tape to show her name in white.
We made a little jewelry
We also did an experiment that I had seen on Pinterest.  We poured a box of baking soda in a aluminum pan.  In four separate bowls, I poured in vinegar and food coloring.  
 
She put drops of the vinegar in the baking soda and watched the reaction.  This kept us busy for a really long time. : )
I had also found some playdough mats on Pinterest.   I like them because they give specific things for the kids to do.  If I was still in kinder, I would have also made a set for my class.  She liked most of them 
 
but her favorite was the little girl.  We not only added face, but arms, fingers, etc.  We worked on this for a while. 
 
We also found a little time to visit the Baylor bears.  Joy was fast asleep in her shaded room.  Lady on the other hand was out for us to see.  
She even swam which was so exciting for EG to see.
We played frisbee for a while on campus too. 
 I always forget how beautiful Baylor's campus is.  We were there just in time as move in and welcome week started today so we avoided the mass of people.
I absolutely love any time that I get to spend with Erin and Alex and am thankful when opportunities arise!  Happy Wednesday y'all!

Friday, August 10, 2012

Monogramming

I love the letters in my name.  My initials prior to marrying the ever-so-handsome Mr. Sage were SBB. After getting married, they changed to SBS.  (BTW my brother and dad share the same letters as I do with SSB and BSB.  We like those two letters!)  Pinterest has undergone monogram mania as of late, so I had a few ideas for some monogrammed clothing.  My mother just happens to have a machine capable of monogramming, so I now am the proud owner of these two jewels. 
 
Love them both!  Happy Friday to you all!

Wednesday, August 8, 2012

Welcome sign

A while back, I saw this welcome post on Pinterest.
I thought that it might work well on our front door, so I followed the step by step to create one for us.
I found some extra wood in the garage that worked for ours:  a 4x4, some kind of thinner wood (I used a piece of plywood that I think was about an inch thick), a hook and some paint.
I first drew off my squares for Cody to cut and the sign itself:
Cut the 4x4 to 24"
2- 5 1/2"x5 1/2" squares
2- 4 1/2" x 4 1/2" squares
1-  4x11" rectangle
 I then sanded down all of the wood pieces really well and used wood filler to smooth off the sides.  I used wood glue to glue together the 4 1/2" and 5 1/2"squares.
 After those dried, I used wood glue again to attached the post to the bottom square set.
 After that dried, I used wood glue again to attach the top square set to the post.
Once all of the pieces were set, I used caulk to fill in any gaps before spray painting the post an off-white.  After drying, Cody added the hook to the front.
I also painted the 4"x11" piece of wood white.  Once it dried, I used scrapbooking letters to make the word "Welcome."  I used a cabinet roller to roll sage green paint over the entire sign and pulled up the scrapbooking letters once it dried to leave the letters perfectly painted.  
This is our final product:

It took a bit of time, but we had most of the supplies on hand which was nice! I'm thinking of making more signs to for different seasons/holiday.  Maybe a 
*Happy Fall Y'all
*Boo!
*Thankful
Any suggestions?

Monday, August 6, 2012

Lost in the Pines

This weekend, we took our annual Brown family vaca.  We have been to Galveston multiple times and Lake Travis, but were looking for a different destination this year.  We found the Hyatt Regency Lost Pines Resort near Bastrop.  This resort was wonderful!  There were constantly activities going on, they had an amazing pool, wonderful rooms and the surroundings were beautiful! They have animals at the resort which my niece and nephew LOVED!  Every time we passed through the lobby, they had to go to look for the huge Newfoundlands.   The food was good too, they had several different restaurants and a little shop that had Starbucks coffee and Blubell ice cream (yum!).  The resort reminded us of a cruise.
On Friday when we got there, we ate a quick dinner at the Firewheel Cafe,
Alex looking adorable in his little hat
 
which has a buffet and then regular menu items too before going to the pool and floating the lazy river for a while.  Afterwards we headed over to where they were making smores before watching a movie on the lawn.  Cody and I also got to relax by another of the fire pits that night.
On Saturday, we rented bikes (which were free along with most of the other activities) and rode around the resort,
before heading to the pool.  (There is a lazy river, beach, multiple pools, kiddie pools and a splash pad)
playing in the sand with these precious babies
 
Alex eating a lemon
The guys played golf that afternoon, while the girls swam, biked again, walked by the river, and ate some Bluebell.

That night after eating dinner, we headed back to the lawn for Diary of a Wimpy kid (they let you make smores during the movie and they also have popcorn too).

On Sunday, dad, Brad, Cody and I kayaked down the Colorado River.  It was much calmer than I expected it to be and oh so beautiful.  I didn't bring my camera though thinking it would be rougher, so picture a quiet serene river.  We hit up the pool again that day for a bit before grabbing lunch in Bastrop and heading home.

We had a great weekend getting to spend time with family and finally relax (these weeks sans grad school are an immense blessing)! 


If you visit the Hyatt Lost Pines (which I recommend you do especially if you have kiddos), you might want to know that it does get kind of pricey.  I would recommend that you bring your own breakfast food and snacks.  Figure out what activities you want to do before arriving if they are ones that you need to book to ensure that you get the times that you want.  Make reservations for Stories if you want a fancy dinner before going.  Take advantage of all of the free activities that they offer.  That alone could keep you busy most of the day!