Thursday, March 10, 2011

It's the ropes and the reins & the joy and the pain & they call the thing rodeo

It's March in Houston which equals rodeo time! I LOVE this time of year! Rodeo always starts with a barbecue cook off the very first weekend which is always so fun!

Then the actual rodeo and all of the concerts follow for the rest of the month.
Sugarland: Jennifer Nettles was like a little ball of energy. They were SO entertaining!

Billy Currington: I didn't think I knew many of his songs before we went, but I did. He has a great voice and cute cowboy curls! : )


We also arrived early enough this day to go through and see some of the animals. There is a "nursery" area in the expo center where they had the "expectant mothers" and newborn "babies." Oh melt my heart! I loved it! Look at these cute little piglets! They were two days old!

We also got to see chicks hatching, incubators, and different breeds of cows. I was just dying to bring my sweet niece there or my entire class of kindergarteners! What a great learning experience that would be and oh how they would love it!

Tim McGraw: Amazing! I mean its Tim McGraw! He played a lot of his older songs, so they were the songs we all knew by heart in high school : )

Keith Urban: So entertaining! He never stopped moving! He even jumped over many obstacles to walk into the crowd in the stands.

And while we are talking about the rodeo, can I just share with you my favorite part? I love watching all of the rodeo, I really do. I am so impressed with the skill that everyone has. However, if I had to pick one event where I will without a doubt be in my seat, it has to be mutton bustin.' OMG! 5 and 6 year olds attempt to ride a sheep, need I say more. They tell about the kids as they are riding and one little boy wants to be a ninja when he grows up and another wanted to be a hunter : ) I have decided that my own children must participate in this. Ellie is close enough to the size of the sheep that they use, so my children will practice riding Ellie. Good plan right? I see a champion in our future.

Wednesday, March 9, 2011

GU Chomps

When I'm running longer distances or am just exhausted from a long school day but know I need to run, I've started using GU chomps as a little pick me up. I started out using GU gel, but let's just be completely honest, it tastes awful. These are like little chewies and you only have to eat one at a time. I think I might have used 2, maybe 3 total during the last half. My current favorite flavor is the orange ones. (I know the link goes to GU's website, but you can get these at Academy or Sports Authority)

Tuesday, March 8, 2011

Thin Mint Mania

Like any other normal person, I LOVE girl scout cookies. As a kindergarten teacher, I have many girl scouts that sell me cookies. My absolute favorites are thin mints and unfortunately my lack of self control with sweets seems to explode when girl scout cookies come around. Now, I've tried keeping them in the deep freeze in our garage to deter my constant snacking, but alas this has not helped. So..I decided to look for a recipe that could quickly get rid of some of the cookies : )

Thin Min Cheesecake

Thin Mint cookie crust:
1 sleeve plus 4 Girl Scout Thin Mint cookies
4 TBS. butter or margarine-melted
Crumble mints in 9 in. pie plate. Add melted butter and blend well.
Press firmly onto bottom. Bake at 375 for 8 min. Cool completely.

Cheesecake:
2 PKG. of cream cheese-softened
1/2 cup sugar
1/2 TSP. vanilla
2 eggs
4 squares Bakers semi-sweet Baking chocolate, melted slightly cooled

Preheat oven to 325. Beat cream, sugar, and vanilla in large bowl until well blended. Add eggs and mix just until blended. Stir in melted chocolate. Pour into crust. Bake 40 min. or until center is almost set. Cool. Refrigerate several hours.


Monday, March 7, 2011

Foof


Two of my favorite friends have March birthdays and both of them love coffee, so when I came across this project on the Jones Design Company website I knew it would be perfect for them.

Coffee Filter Foof
You'll need:
-Styrofoam ball (mine was 5")
-Coffee filters (I used about 200 per "foof")
-scissors
-hot glue gun and glue
-ribbon & 2 pins

1. Cover styrofoam ball with 2-3 coffee filters to keep it from melting when the hot glue touches it (I used super glue for this)
2. Fold your first coffee filter into eights and snip the end (once i got the hang of this, I was leaving several filters together for this part to make it go quicker).
3. With the filter still folded into eighths, put a glob of hot glue onto the styrofoam ball and glue down the filter. (Continue this until the ball is completely covered in the filters)
4. After the ball is covered, trim any parts that are uneven.
5. Cut a piece of ribbon, fold it in half, use a straight pin to pin it to the foof.

Sunday, March 6, 2011

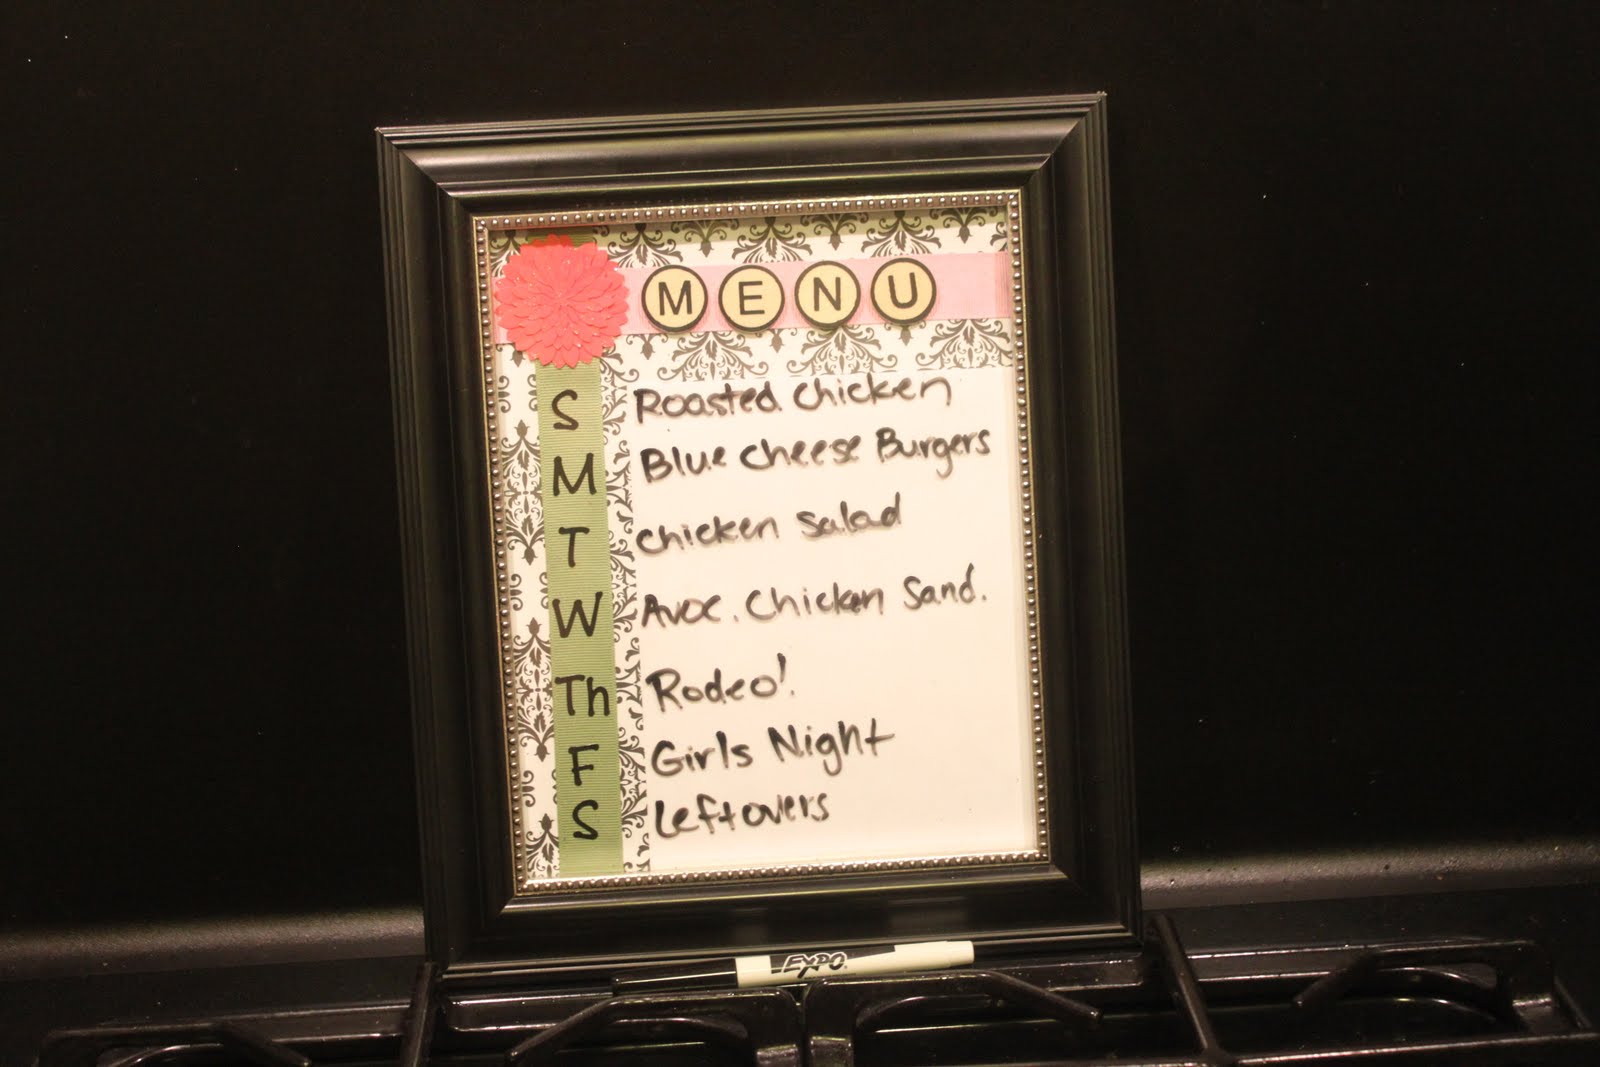
Weekly Menu Board

My newest obsession might be blog stalking crafting blogs. While doing this the other day, I came across the idea of making a weekly menu board out of an 8X10 picture frame. You can write your weekly menu on the outside of the frame with an expo marker and erase it easily for the next week! I mentioned it to some other girls and we made it a crafternoon.
For this easy project, you need:
*an 8x10 photo frame
*scrap booking paper
*scrap booking letters
*any embellishments you may want to add (I used ribbon and flowers)

My menu board

One I made as a gift

All of our finished products

Sunday, February 27, 2011

Perfect Roast Chicken

Let me just begin by telling you that this recipe was without a doubt a learning experience:
1. A whole chicken will not defrost quickly. If you think that it is defrosted, the inside is in fact not
2. My dutch oven finally has a use! Woohoo!
3. You do not want to know what giblets are. I was praying for strength today as I removed them from my chicken. I feel that what does not kill me only makes me stronger. Next time as I remove the giblets I will not scream like a little girl...
4. I got to use our meat thermometer for the first time.

Without further ado, let me introduce you to this super yummy recipe. I saw it on the Little Kitchen that Could and she had found it on the Food Network from Ina Garten.

Perfect Roast Chicken
1 (5 to 6 pound) roasting chicken
Kosher salt
Freshly ground black pepper
1 large bunch fresh thyme, plus 20 sprigs
1 lemon, halved
1 head garlic, cut in half crosswise
2 tablespoons (1/4 stick) butter, melted
1 large yellow onion, thickly sliced
4 carrots cut into 2-inch chunks
1 bulb of fennel, tops removed, and cut into wedges
2-4 small red skinned potatoes, quartered
Olive oil
Other tools
A roasting pan or pot (I used my dutch oven)
Kitchen string (I did not have this, so I use a wooden skewer that I cut down to size)
Meat thermometer (optional, but extremely helpful)

Step by Step
Preheat the oven to 425 degrees F.

Remove the chicken giblets from inside the chicken. Rinse the chicken inside and out. Remove any excess fat and pat the outside dry. Salt and pepper the inside of the chicken. Stuff the cavity with the bunch of thyme, both halves of lemon, and all the garlic. Brush the outside of the chicken with the butter and sprinkle again with salt and pepper. Tie the legs together with kitchen string and tuck the wing tips under the body of the chicken. Place the onions, carrots, potatoes and fennel in a roasting pan. Toss with salt, pepper, 20 sprigs of thyme, and olive oil. Spread around the bottom of the roasting pan and place the chicken on top.

Roast the chicken for 1 1/2 hours, or until a meat thermometer register 160 in the breast meat.Remove the chicken and vegetables to a platter and cover with aluminum foil for about 20 minutes. Slice the chicken onto a platter and serve it with the vegetables.


*I did not take a picture of the beautiful chicken (sad day), but look at the Little Kitchen that Could's pictures of her beautiful chicken!

Wednesday, February 23, 2011

Craftastic

So I might've gotten a little obsessed with crafting these past few weeks. I did warn you though when I was posting about my burlap wreaths. I've made a few things lately for my niece and nephew...
For my niece, Erin I used the great Jones Design Company tutorial site (I think I might end up trying to make everything on their tutorial page....)
The first thing I made for Erin was these hair clips that were super easy! You just use metal clips, 3/8" ribbon and glue (I used my glue gun, she suggests fabric glue). Check out the tutorial!
For the flower clip, I used the flower pin tutorial to make the same kind of flowers that are on my wreaths.

I also made a flower mobile to hang over her teeny toddler bed : ) Here is the tutorial for that.
For sweet baby Alex, I made a book canvas. On her website, she uses black and white book pages, but I wanted the book to have meaning for him and as his room has trains, I used "The Little Engine that Could." Can I tell you that as a kindergarten teacher, it was REALLY hard to tear the spine off of the book to rip out the pages (it almost didn't happen...). I did however make sure that all of the important parts of the book are visible in either word or picture : ) Here is the tutorial.
The finished product

Hanging in his nursery

I also loved my friend Gina's valentine craft and thought the idea might work for Alexander. I used letter tiles from Hobby Lobby that had sticky backing (basically like stickers), scrapbook paper and the train that I had originally bought to embellish the book canvas (that would have looked WAY too busy!)

(had to sneak a pic of him in...)
Have a craftastic day! : )